Hello all.....Sorry I've been AWOL for such a long time since my last post. Now, back to work!
Let's examine a technique used to create city streets and sidewalks. Because I have a better sequence of pictures of how I completed the little "village" on the layout, I'll start with those details as an example.
Below is the corner of the layout where we'll find the proposed village site. Note that as with the rest of the layout, I used a WS foam padding over the birch wood bench work base. The C track and the buildings will now be on the same level. BUT....this foam surface is way too soft for the Bush adhesive street products detailed below.
So I added 1 mm acrylic hard plastic sheeting held with old fashioned Elmers white glue to give a firm surface.
Now---- how to lay out the building positions, streets, parking, lights, etc ??? The unfolded strip of Busch Roadway material is seen in the middle of the proposed roadway, leading from the crossing ramps.
Materials used:
1) Busch 6031 Street adhesive ( lovely cobblestone pattern) -- 2) Busch 6032 adhesive Paving squares ( under the buildings)
3) Noch 60670 Sidewalk adhesive 4) Noch Stencils 60740 ( for road markings, parking lanes, center lines using an air brush and acrylic white modeler's paint. --- 5) Noch Curbs 14209 --- 6) Noch Road signs 60525
Final appearance. Sidewalks and streets in place. Now we need parking lanes---and much more...like buildings, people, cars and street lights.
Using the Noch stencil package and an air brush.....using blue tape to make certain there is no overspray. Be certain NOT to have any of the blue tape adhesive touch the Busch streets ( so place tape backing on all sticky tape surfaces) ...otherwise any contact with a sticky tape surface on the Busch street material will ruin your day....you'll mar the road surface and be really upset! Believe me!
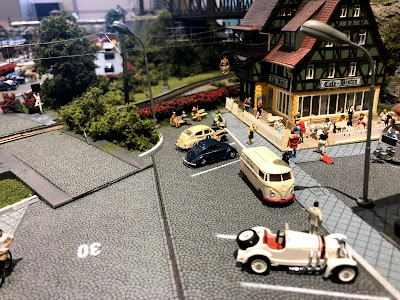
Aha...now we have parking spaces, directional arrows on the main part of the street, and a speed limit of 30 ! Curb pieces mark the ends for the parking lanes.
Now it's coming together. What do we need next? --> people, cars, people, building lights, people, and street lights....and people .....sorry, just emphasizing a point........
Let's view some final pix for this section:
No people, street lights or cars yet! Notice the difference?
Notice how the bushes around the RR crossing...seem to "channel" the viewer into the village over the crossing..?
 As above.....I guess by this time, we are all adapting to "outdoor dining" ! ;-)
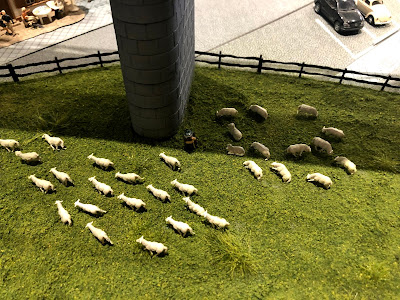
 Above--Added a little meadow to at the end of the layout to complement the serenity of the village.
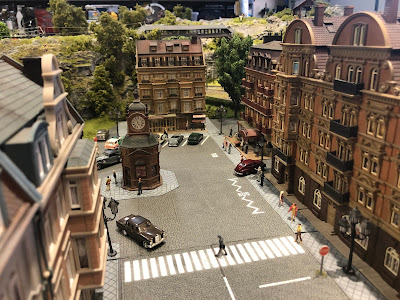
Now we can take a tour of the rest of the layout which used the same techniques as with the village. This pic identifies the end of the city near the mountainous area documented on previous blog entries. Again note the use of the Busch street adhesives, air brushed parking lanes, etc, and the addition of lots of citizens.
This pic is the adjacent to the pic above with typical apartment type buildings and roadways.
Below is a corner added to the layout to soften the harsh right angle of the layout bench work. Of course we had to place a "gate keepers cottage" to watch over the crossing gates. As an aside, I finally gave up on the Faller crossing gate system....I tried for months to make it work, but in the end I surrendered. Probably the best option in any case, because with only a single main line, and five or more trains running in a scripted block system, the Faller gate system may have collapsed in exhaustion. BUT...I have warning lights which are contact track activated with each passing train... ( sorry for the unruly gaps from time to time...I'm having some problems with the software..my bad)
Caution: these new building lights are terrific but they are LED's...and if connected to typical digital transformer current which supplies the layout and CS's, they will flicker because of the digital current. So I had to connect the M84 which turns on these lights to an old fashion dial type Marklin transformer with the power to the M 84 connected from the red/ brown side of the transformer. ..now lights are NOT flickering.
Nice view of the crossing gates....note here , as with the rest of the layout, the strategic placement of trees, bushes and other greenery to "direct the viewers eye" in a specific direction...called visual manipulation! Note that even the curb material used to "frame" the green lawns subjectively pulls the viewer into the scene.
These "Nuremberg" lights are almost 20 years old and sooooo very fragile. They require so little current, so I had to connect them to the M84 using the adjustable ( dial ) transformer type. Here the lights are connected to a standard Marklin transformer....too much juice !
Some scenes from the city ................
Main Street
To the left is the Post office, electrical grid station, and brewery...also a "control tower" for the trains.
Now we'll look at an interesting problem....how to make a curved center line on the street....( I just recently found a Noch product which will allow you to do that ) ...but here I just used the Noch Curb ( Kerb ) materials to create a center line and a lane divider which probably has more prototypical significance than a simple white line.
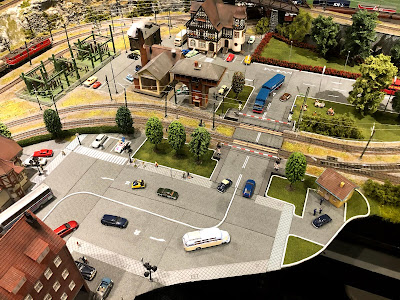
A similar problem was presented with the street traffic pattern from the street junction above to the right, heading toward and past the Bahnhof, and eventually following the road ending in the Village. The Freight yards and lanes are on the far side of this viaduct. ( as the old military saying goes: "improvise, adapt, and overcome". )
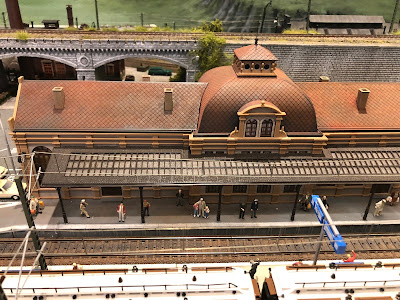
The Bahnhof.....lovely building.
Below...platforms....awaiting the platform lights --on order...holes drilled for the plug-in sockets...precisely at 6.5 mm....drill hole started with a
sharp pointed drill bit smaller than 6.5 ...found at Home Depot....otherwise if one tries to trill a hole in that smooth plastic platform using the typical drill bit, the drill bit would scoot all over the place and mar the plastic. After drilling a pilot hole, then finish with a 6.5 bit
Note strategic placement of bushes along the edge of the layout....pulls the eye toward the Bahnhof and the platform cover.....
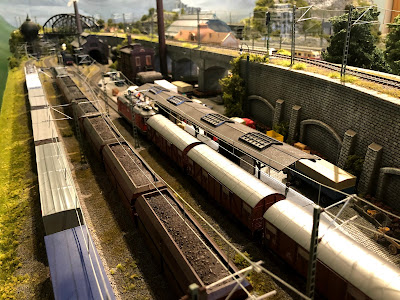
Now a quick glance at the Freight yards and lanes then we are done....
The Bahnhof...(.this software is difficult) ......sorry this one is out of order....the grander perspective of the Bahnhof area and streets / roads heading toward the village in the distance.
Some activity in the Freight yards....
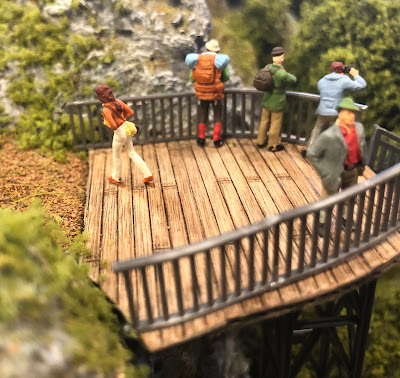
Remember this area?...this is at the top of the stairs leading from the city to the pathway , which crosses two bridges, and winds around finally end in the Kirche Platz....this platform was made from a thin piece of cardboard, on which was placed "planking material"--- and railing added ...for pedestrian safety, of course. It's fun to make your own scenery materials too.
Below is a follow up pic of the end of the layout where the Kirche Platz traverses, but note by comparison the extensive foliage in the left lower corner which blends the end of the layout to the rock edifice ....(compare to the pic in one of the past blogs)....vegetation, people and cars add so much to a layout...
Well, I guess that's enough for now.....I hope you've enjoyed. Perhaps at some point in the future, we can review the process for some "scripting" with the CS3 and the use of Contact Tracks, S88's, etc....( we already covered signals in an earlier post. ) Let me know if you want to touch on these subjects....I am not the ultimate expert by any stretch of the imagination, but I have anguished at times with frustration trying to negotiate the learning curves....If I can save anyone that misery, it would be my pleasure.
See you down the rails someday......
Be well, stay safe and many blessings.... alan















No comments :
Post a Comment