Thursday 26 July 2018

Update Photos of the Helix

Hello all,

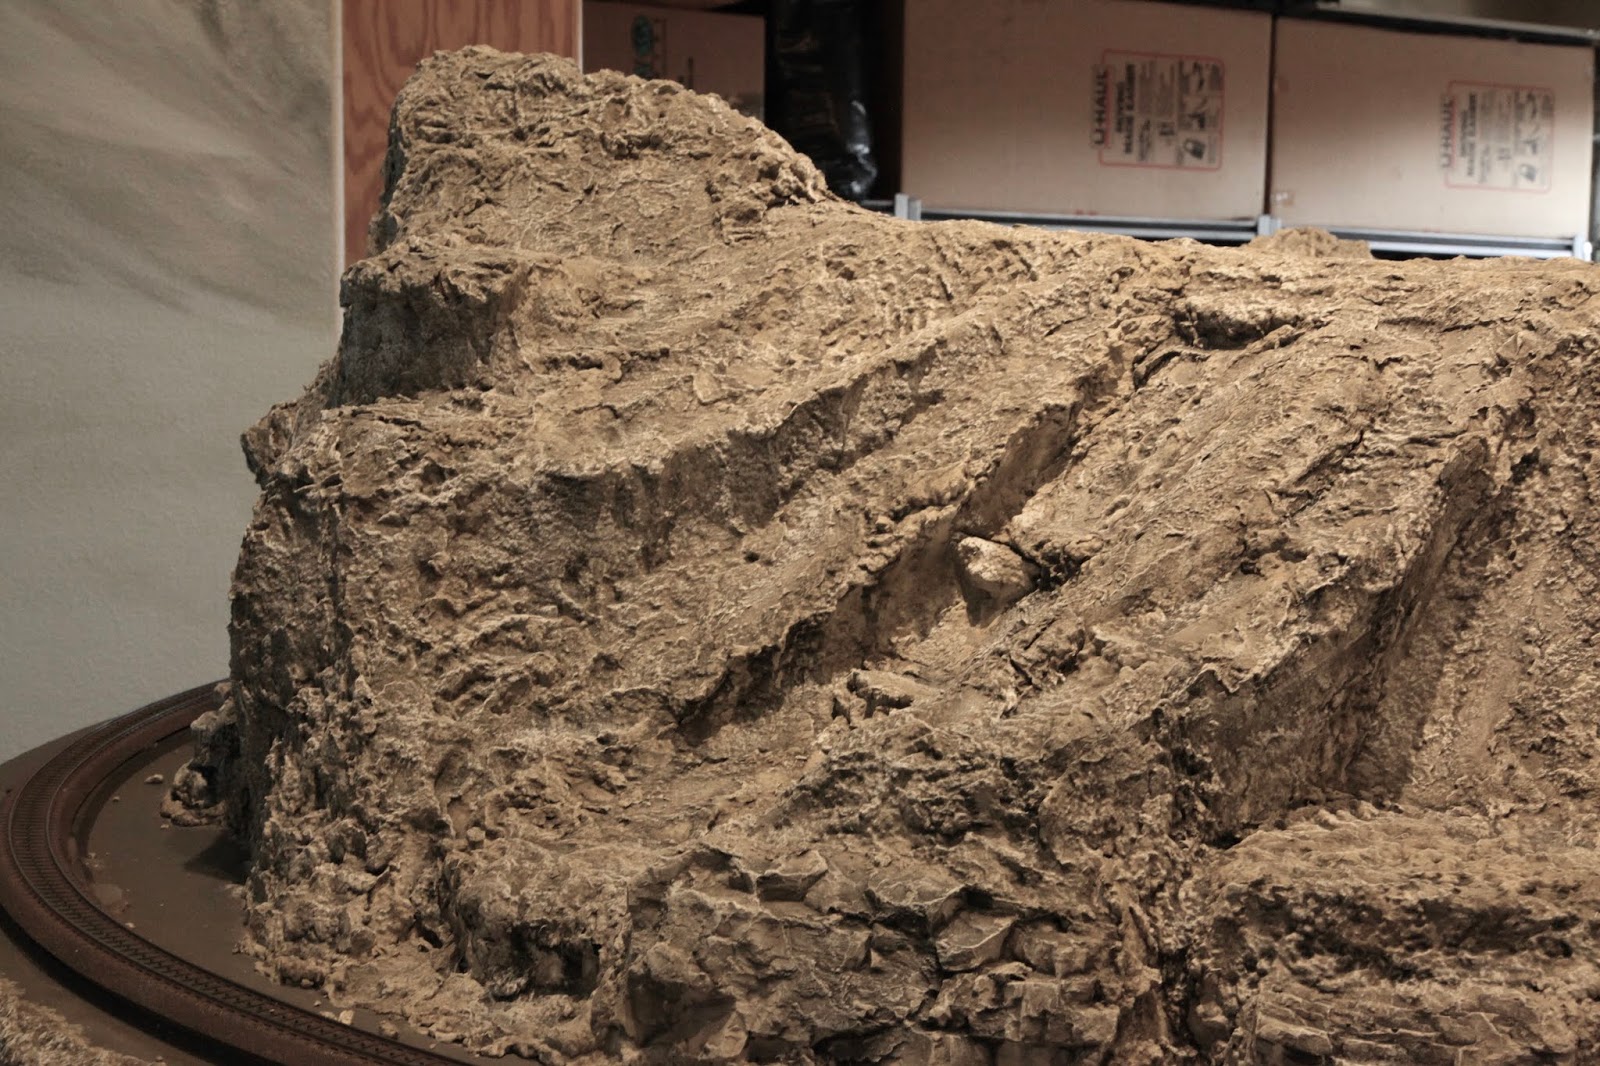
I've been working on the helix scenery,  attempting to refine what was previously applied, as well as adding some new aspects to the overall presentation to the viewer.   Hope you enjoy these few pix.

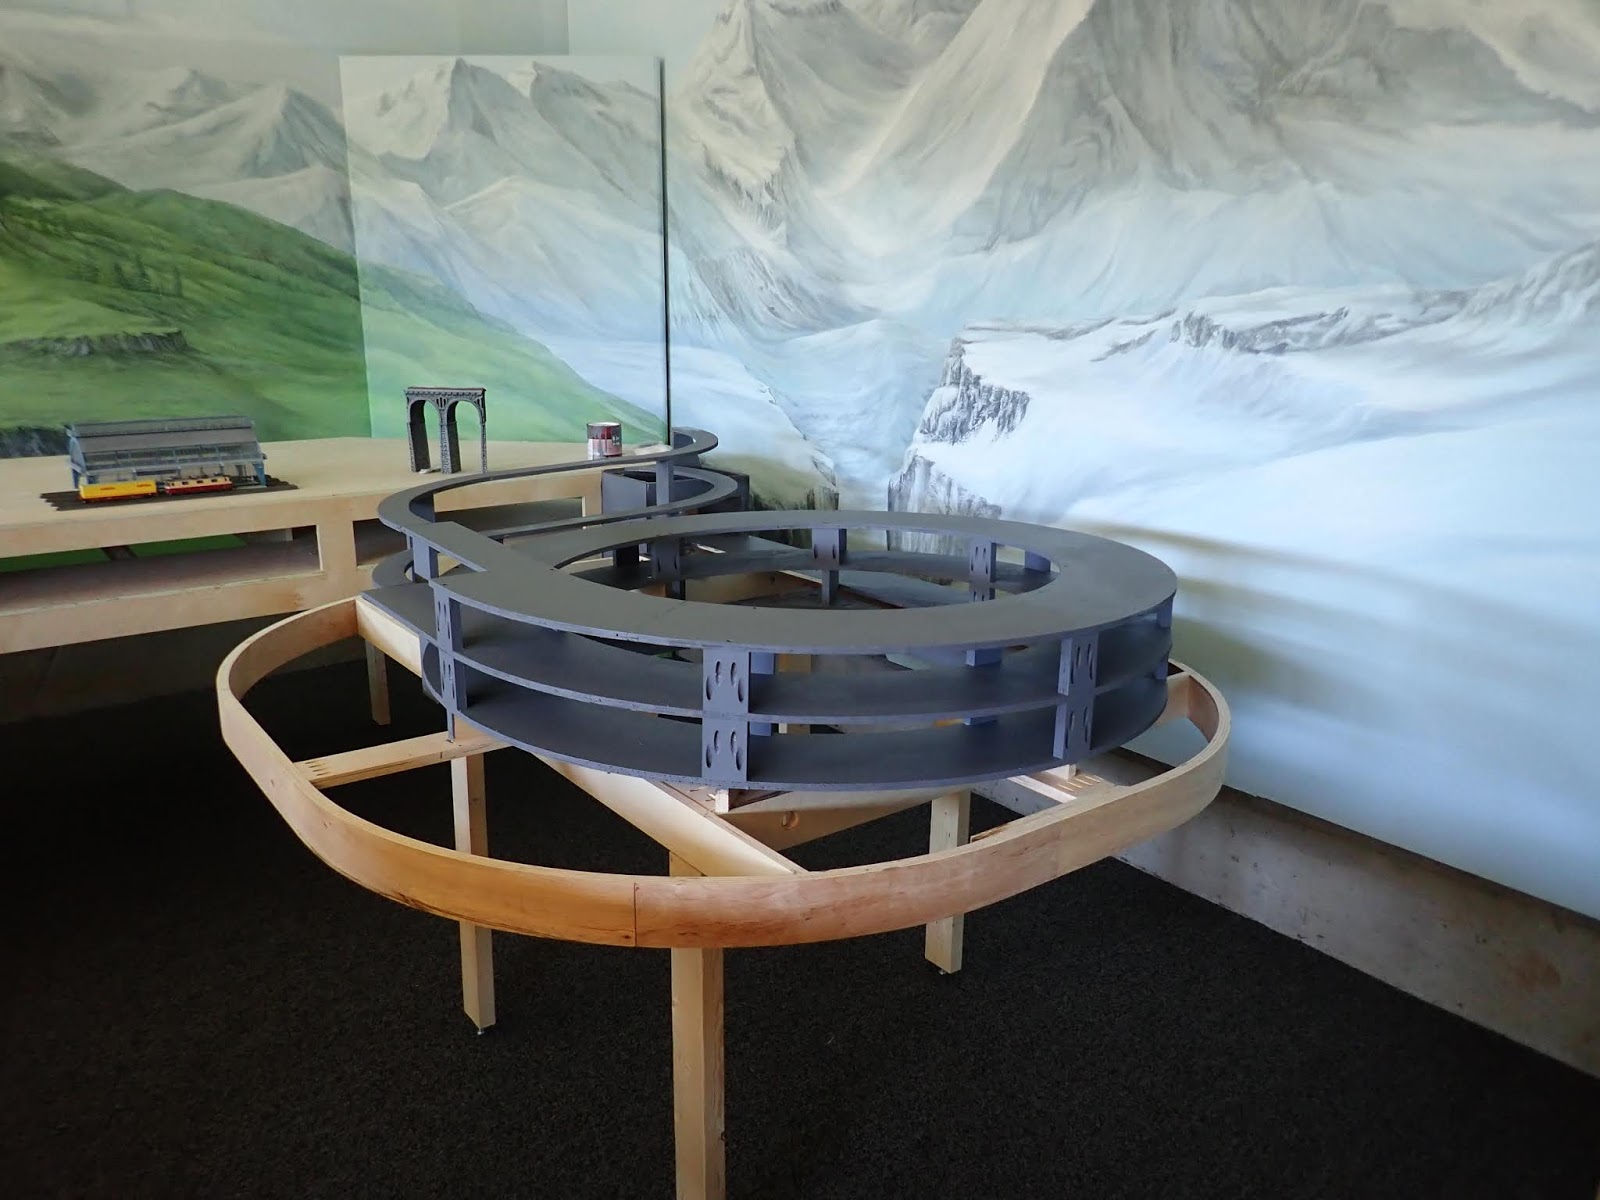
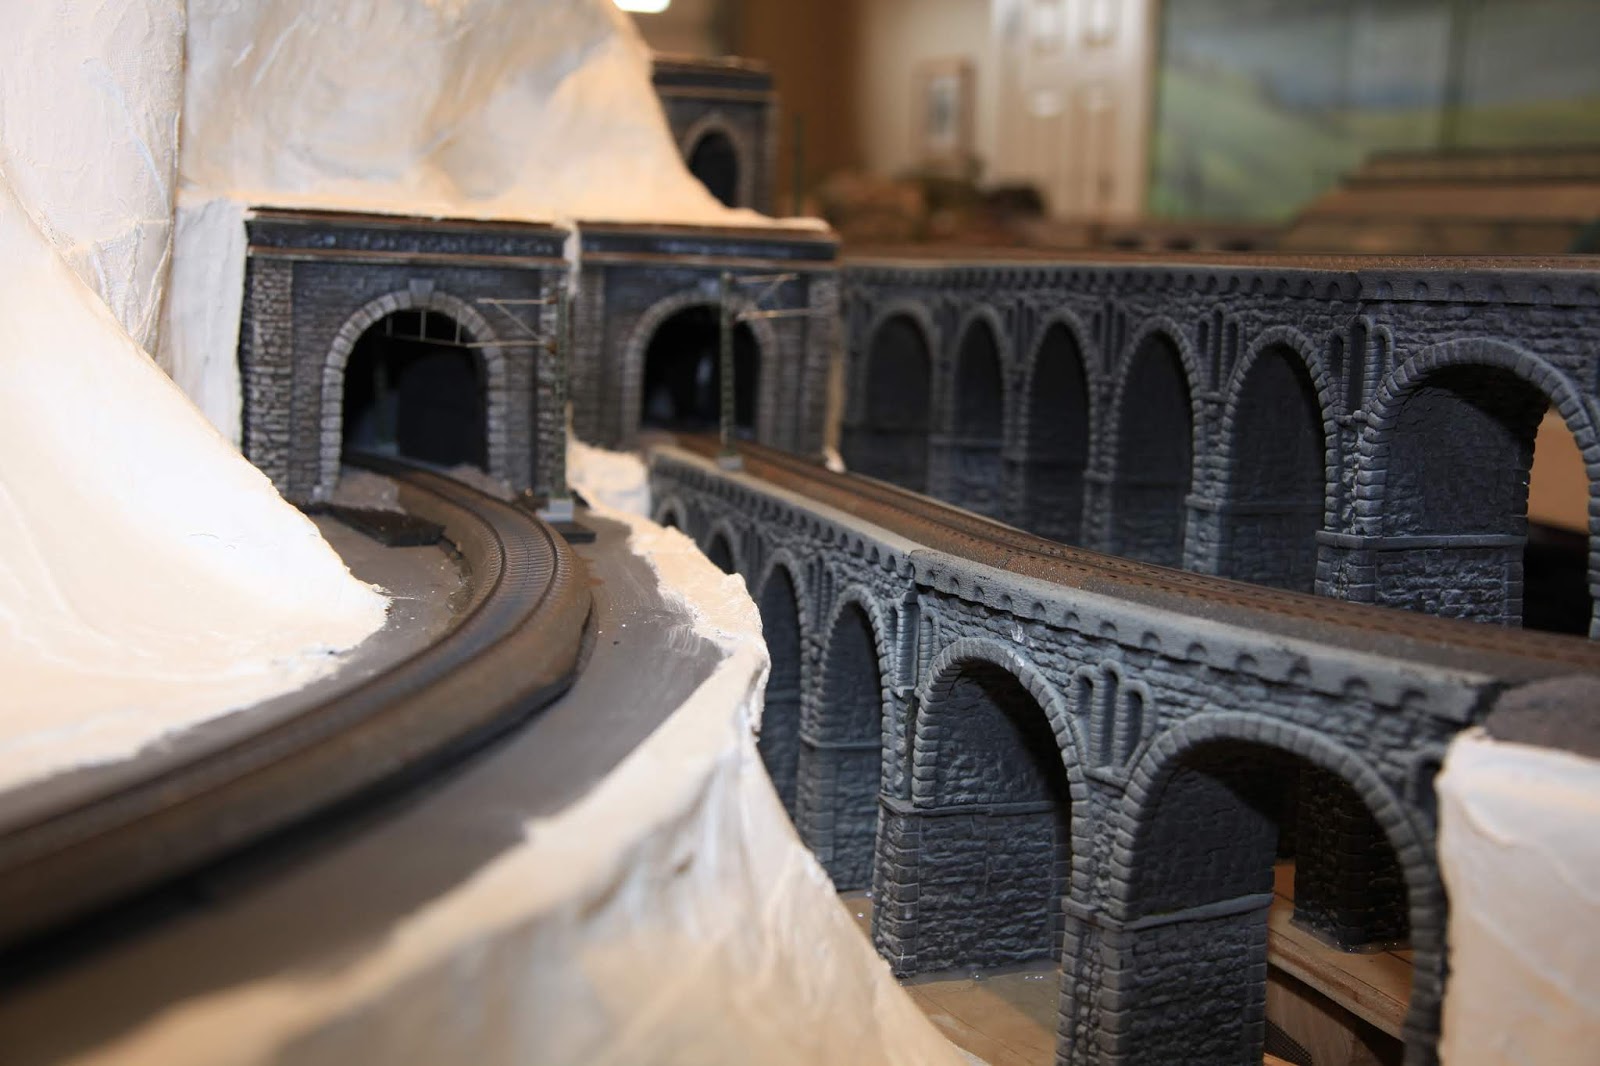
Some "catch up" shots:  The helix under the Sculptomold mountain. Arcade "pass though"  adds appeal.


 Another view.  There are three collecting "pools" of glacier water on the plateau just to the left of the snow capped mountain, which eventually will spill a series of small gentle water falls onto a ledges at the left side of the mountain. --more of a "drizzle of rivulets" .....


Better view of the arcade which partially encloses the ascending lane from the staging yards to the main layout on the Lt.


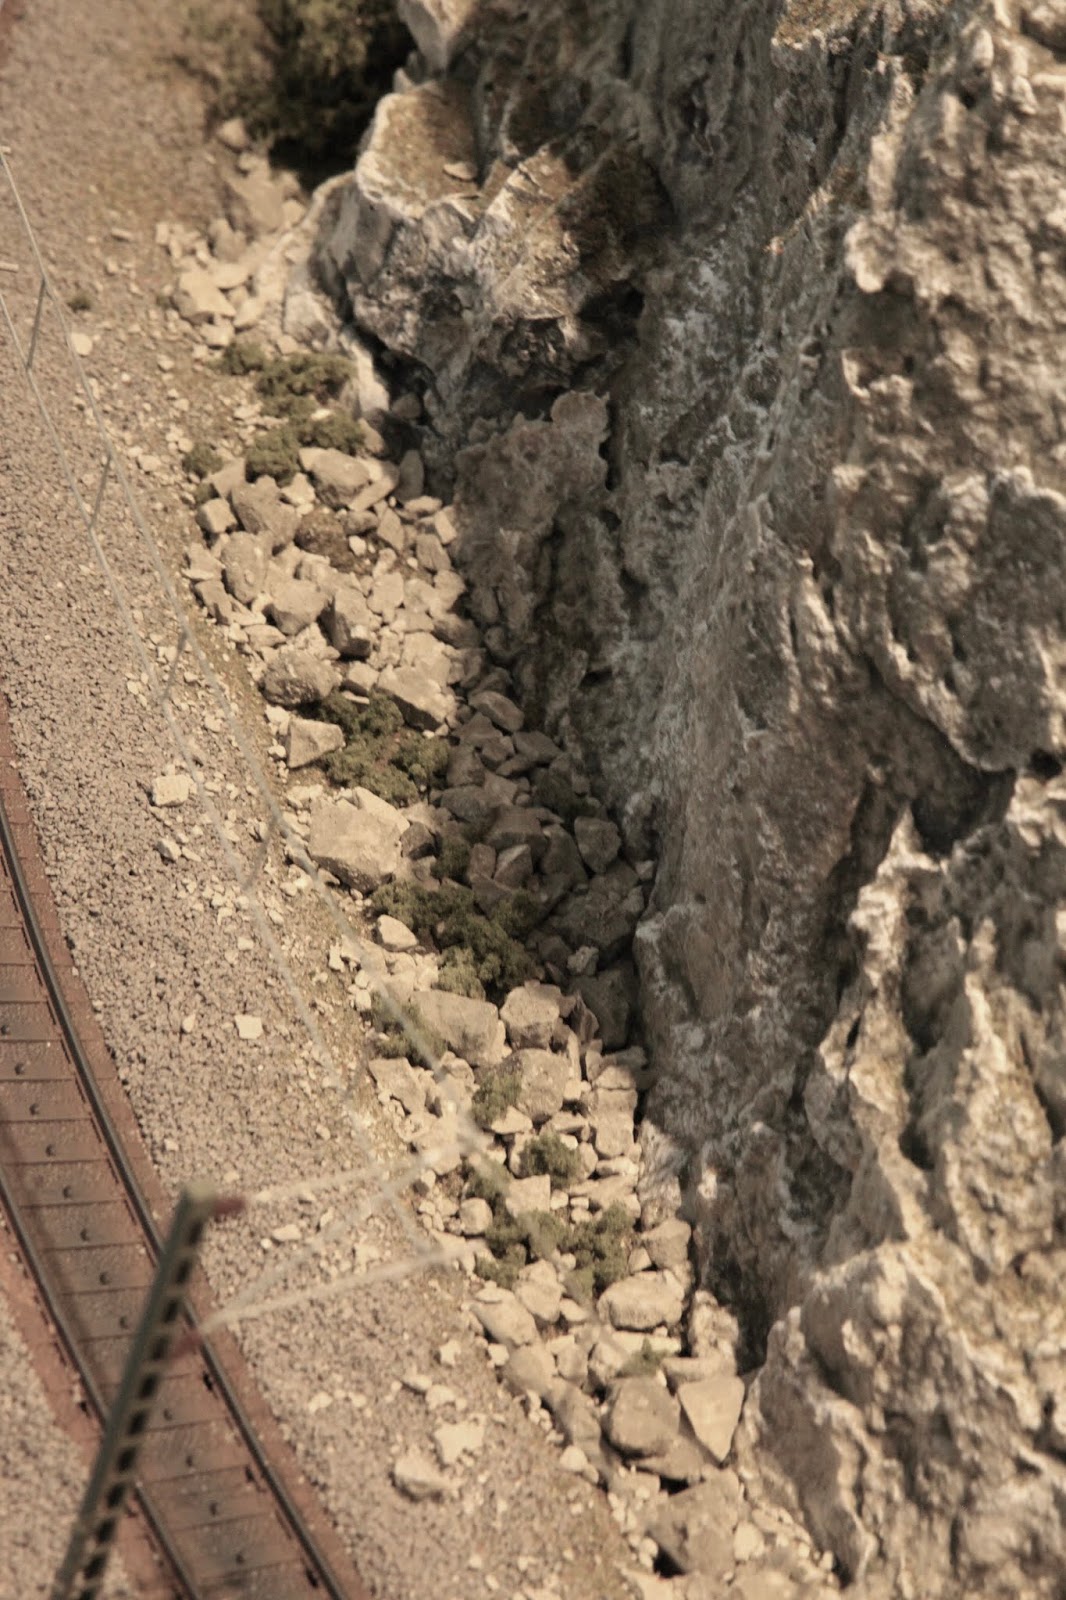
Added "scree"-- boulders and rocks --at the base of the mountain.  Made the scree using old fashioned hammer with old plaster of paris rocks enclosed in a towel.  Soaked the rocks in gray dilute pigment and dried them on paper towels. The smaller the better!


More scree on this side of the mountain...again..another method to soften the "hard" line borders between rocks, ballast and Schulptomold....


This technique really softens the visual lines between the base of the mountain and the ballast.


Starting to build around the base of the mountain. Goal: to have multiple gentle water fall streams   cover the face of the mountain under the collecting pools on the left side of the mountain plateau, and have the streams collect in a small basin below which then forms a gentle stream running along the base of the mountain from Lt. to Rt. The "base" is now painted green.  ( I had to paint this surface...I made a mess of the white surface while staining the mountain.--spots and drops all over the place ! ) ( BTW.....lots of "drop cloths" on the floor under the working surfaces.)


Just when you think you have a project all "figured out", boom...an "uh oh" appears. Problem: the vertical drop from the top edge of mountain will not hit the base well, so I added two ledges ( hot glued cardboard pieces to the wall )  onto which the water streams will hit the surface then fall to the pool below.


Sculptomold on the ledges, forming a small pond and egress stream with two water falls before exiting the layout on the Rt.


First water fall below the collection pond at the mountain base with stream flowing around the mountain.


Further developed.


Steam exit stage Rt!


Completed project....now allow to dry, stain and ponder how to make realistic water with falls!!!


Even applied Sculptomold around the base of the mountain, and "outlined" the viewing windows into the helix itself.


Finished the day with static grass / catenary and other scenery to the left side of the viaducts.


Thanks for viewing....it's fun sharing the development of this layout with you.

Be well, blessings...alan

PS...I highly recommend the series of YouTube videos by Luke Towan ....excellent !!!! Best I could find...this guy is a real master !

<https://www.youtube.com/channel/UCjRkUtHQ774mTg1vrQ6uA5A>


Wednesday 18 July 2018

Scenic Detail for the Parade Routes.

Hello again....

Interesting scenic nuances discovered today while addressing finishing touches on the Parade Routes.

The Parade Routes cross the front of the layout over a distance of 12', at an elevation of 4" over base level on 4" WS risers shown below.  The tracks are unmounted on foam tracks from WS as well.


Using crushed newspaper type paper taped to the risers, then covered with orthopedic plaster gauze, the rock molds were mounted with Sculptomold against the WS risers.


The Sculptomold requires about a week to "cure" or dry suitably so stains can be applied.  I used the WS Leopard Spot technique again ( actually my variation of such) but increased the pigment concentration to darken the wall comparable to the previously completed corner unit which was achieved by a different process described earlier in this blog.  The two grey colors did not match as well as hoped, so I diluted the acrylic paint used on the corner unit and over sprayed the "new" wall with the airbrush and the colors. Then they matched!  Love that airbrush.


Dry brushing with white acrylic paste brought out lots of beautiful rock details from the rock molds and the Sculptomold.


I like the detail here.


Lovely detail. ;-)


Now how to add green to the wall?  Too often portions of layouts appear "sterile" because they lack strategically placed greenery detail in the landscape.  The most often employed technique is to "spray" a mist of adhesive such as Mod Podge and then gently "blow" a mist of fine turf type material onto the wet surface ......but ....then we have a large area with the adherent material which sometimes does not appear authentic.   So what to do??  When in doubt consult an expert !  So I asked my lovely wife for her advice. ....we have lived in mountains or recreated in mountains most of our lives...so my wife knows mountains !  :-)   Her advice:  place moss like growth on the top surfaces of the rocks and sparingly on the sloping sides of the wall.     Easy peasy ! ....brush dilute Mod Podge on the surfaces to be coated with turf material and then go for it!!!


Happy with the result....note also that I added a sparse fringe of the turf material along the edges of the wall where it meets the ballast material....nice touch to diminish the harshness of that edge.

 Now all we have to do to complete this part of the scene is to add the cantanary down the center line.....but....because so much scenic detail is pending on the inside of the wall, and because the overhead wiring could be damaged by leaning over the wall ...I'll delay installing the overheads.


Well, I guess that's all for now....thanks for viewing ....

Sunday 15 July 2018

Weathering the Mountain Terrain.

Hello friends,

Over the last few days I have been attempting to weather the mountain recently constructed on the layout helix.

From Woodland Scenics I ordered the following pigment containers: Black, Stone Grey, and Yellow Ochre. I followed the WS instructions on this video:
https://woodlandscenics.woodlandscenics.com/show/video/ColorPlasterRocksECLP

The "Leopard Spot" technique was employed with the following results:

Before:


After:...unacceptable to my eye. The Sculptomold did not seem to absorb the dyes well compared to the rock castings, featured in the video. The "granite" rock is much too washed out and not nearly grey enough compared to my other rock terrain features. I increased the pigment concentrations, added black to the grey to make the solution more charcoal, reapplied the solution,  ...yet it didn't seem to work as desired.


Plan B:  I used the airbrush and diluted the Stone Grey pigment by 50% to "over spray" the entire mountain...This shot appears more brown than grey...but it is grey...this technique darkened the stonework and brought out significant rock relief detail.


Frontal view...better color on this shot. This grey tone is consistent with the background mural and also with the completed rock work described earlier in this blog.


Sorry for the color discrepancy...I had adjusted the color in the computer but the true color did not transfer well here.


Below: Dry brushed the rock work with white acrylic tube paste to enhance the textured detail so characteristic with the rock molds and especially the Sculptomold. 


Another view after dry brushing with white.  ....and no vegetation applies as yet. This will be fun to work with as the project progresses.   Trees, ground foliage, "moss dusting" of WS fine blended turf, drainage ponds, and gentle water falls are next.


Thanks for viewing....if you have suggestions for alternative methods, please advise.....alan


Monday 2 July 2018

The Helix....building a mountain.

Hello again, my friends......

Now it's time to build a mountain....during one's lifetime, how many people have the opportunity to build a mountain  ??---but here we go !

Let's begin with the helix itself:  2.5 turns from base to top level.  2.3% grade, R-4 & R-5 curved C track.   Painted gray because I plan to leave open the side of about 1/4 of the vertical circumference so viewers can see inside the helix for interest. ( the open area will be to the viewer's rt. front. ) Feeder wires populate the track.  


Added 2' foam on the open areas at the base. Started to " screen" in the sides of the helix with nylon screen door material from Home Depot, stapled and trimmed.  Built "quarry stone arcade"  system with Noch product ( #58269) and "kit bashed" a background wall from old material from previous layout. Ran catenary all the way through the arcade...because folks can see into it ! Track already weathered and ballasted.


Another view. 

Front of helix: top track is the ascending track which enters the main part of the layout to the left, about 4" above base grade. Trains run from Rt to Lt.  The bottom track ( in front of the Noch wall) is the beginning of the descending track to the staging yards on the left. Note the interior tunnel liner to the Lt. 

Building the vertical supports for the mountain terrain. Anchored with screws, and cross braced with 1" X 2" slats.  Now comes the real challenge....to arrange the nylon netting to complement the background, such as mountain valleys leading the viewer's eye to through the mountain terrain to the background....done on various aspects of the mountain terrain around the helix. 


Netting completed. Hard to see the detail at this point. Note a portion of the helix "open" to view on the rt. side.  Stiff cardboard "lid" placed on the Arcade structure and braces with smaller pieces of cardboard. 

Orthopedic plaster cast gauze material applied over the netting.  Purchased the ortho. material in bulk from an online supply house--actually fairly inexpensive. This forms a shell onto which we can add rock castings and Sculptomold.  We can see the detail of the top "ascending" lane and the arcade, as well as the lower level descending lane.  The area over the arcade: too flat !  

Time for more construction...glue gun, please ! 

Viaducts !  There are 12 tunnel portals is this helix complex. Should be a lot of fun watching the trains dance in and out of the tunnels as they weave their way around the helix. 

Note that the catenary was anchored inside the tunnel portal with appropriate stanchions.  Tunnel liners inside portals provide positive impression.  ( thanks, Walter and Jan ! ) ;-) 

Bring on the Sculptomold !!!! ( and some rock castings ) Aahhh...the area over the arcade looks a lot better now ....Sculptomold also bought in bulk from the big "A" ! 

Note the valleys leading to the background scenery.  Sorry the pix are not too clear in detail-- because color tone extremes from pure white to black ! 


I'm planning some "snow melt" and  the forming of connecting small pools of mountain water, and gentle waterfalls along the path of the water descending from the top of the mountain , eventually reaching the mountain  LQ at the top of the helix where we'll see a gentle waterfall into a small lake below, and then a draining river from Lt to Rt wrapping around the base of the helix.

Viaducts. From Lt to Rt: ascending loop of helix, lower viaduct of descending arm to helix, upper viaduct--ascending arm of the helix to main part of layout. 

On the descent....

Ascent to main part of the layout. 


Now we wait till the material dries completely...about a week !!!  Then I plan to try a different method of staining with Woodland Scenics pigments: Stone Gray, Yellow Ocher, and Black....followed of course by planting dozens of fir trees and topped off with a crest of snow at the peaks....should be fun to create this "mountain-scape". 


Hello friends.   Sorry that I have been A.W.O.L. for a while.  Life happens as we all realize.

Since my last post I : 

1) Converted to the CS3 + unit !  The learning curve was a bit steep, but ultimately with friends like Curtis of the Marklin Dudes and perseverance I escaped the clutches of frustration.  Wow! What a unit is the CS 3 !

2) Began scenery in some critical areas of the layout to test different construction methods.

3) Have trains running....yahoo !

4) Donated a lot of equipment  / track to the NW chapter of ETE for their SIG modules. Wish them good luck in growing that chapter as led by lots of  energy with Mitch. Please support them if you can....or join !  Great group of modelers.

Now onto the fun ......

Corner Module:   


Began with trusty hot glue gun and styrofoam boards ( 2" thick) molded a little with a rasp. Applied Sculptomold and rocks from  molds with pleasing affect. The idea is to see the train "dancing in and out of terrain features" which adds interest.


 Side view.  Lot of detail in with the rocks from the molds.


Now a coat of inexpensive grey latex paint from hardware store.


Better detail of affect of grey paint. 


Dry brushing with white acrylic paint -paste.  Easy peasy. 


Better view. 


Used dilute yellow ochre, raw umber, etc to add some color to the rocks.  One of the secrets is to spray the formation with dilute Mod Podge ( 1:4 dilution) then "blow" onto the surface Woodland Scenics blended turf ( fine). Process: take folded piece of letter sized paper ( folded length wise), sprinkle the blended turf into the crease and gently blow a sparse "mist" of the material onto the surface treated with the adhesive.  This tones down the rock faces and adds "character"  to the rocks, as if a fine coating of scattered moss is growing on the rocks....looks neat !  

Add foliage and the results can be quite pleasing. 


Final result....Catenary installed over the turnout, track already weathered, ballasted and glued in place with the dilute Mod Podge. ( 1: 4)  Using Mod Podge seems a better option than white glue. The ballast adhered with the MP seems to transmit undesired sound to the underlayment much, much less that that held with white glue. I suspect that the MP has some elastic qualities vis-a-vis the white glue.  I have tested both.


Another view. 


Happy with the end result and especially with the prototypical "super-elevation" of the track around the turn !!! 


More to come .....just finished building a mountain on the helix !!!! 

Thanks for viewing....be well, and blessings....alan