Tuesday 7 May 2019

Landscaping Part III

Well, here we are again, only this time we are coming down the home stretch to finish the mountain scenery on the layout.   Thank you for joining us.

The pictures posted here hopefully will show the progression of  techniques already discussed.


This blue / pink  foam combo began with 4 layers of 2" insulation foam. ( The pink foam was from Home Depot, but they stopped carrying it in store,  but Lowes carried the same material in guess what color?  ) ;-)

I have no earthly idea how many glue sticks I have use on this layout !  Carved the foam with my trusty hot sculpting iron previously described.  In the last section I noted that all terrain features, be it trees, mountain contours,  even placement of figures...should all have a purpose...that is to guide the viewer's eye....

Below note that the "notch" on the close side of this formation slopes up....toward the Kirche Platz, ( the church ) and the large mountain on the mural !


Forming a walkway from the last bridge down the formation to the Kirche Platz. 

Below ....toward the tunnel and Kirche Platz...


Note that the entry to the tunnel is lined with Noch wall material, but the tunnel is large enough to allow the viewer to see through the tunnel.   Now a series of pix with the orthopedic gauze  coverings. 


And now...some of the results. 


Note the walkway leading the eye to the Kirche Platz, as well as the helix w waterfall, and the large mountain in the mural ....


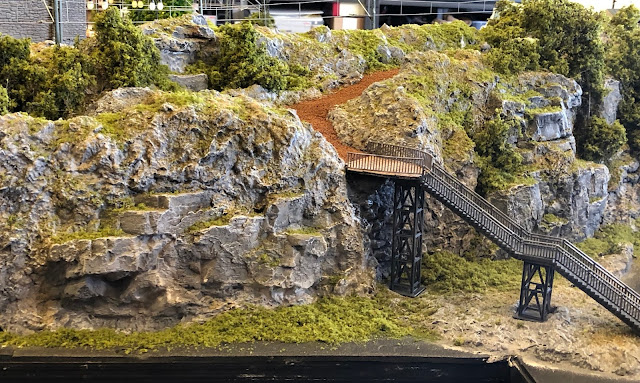
Here we can see the stair case at 9:00 from the city, the path from the staircase to the Chapel, and then the pathway to the pedestrian bridge and then arching back to the Kirche Platz. 

The upward slope of this mountain pulls the viewer's eyes.....


Now it all fits together....


Interesting how just a "dash" of color seems to create a serene ambience.......it is only a little "coarse turf" from WS. 


Thanks for joining me on this little journey ....hope you enjoyed it.....Blessings ....alan


Landscaping Part II

Thank you once again for "tuning in" to the is little journey with my layout.    I am having fun documenting the progress in its construction. 

We already covered the techniques with the previous post...so let's just show some developmental pix. 

The next area to scenic is the one at 3:00 with the smaller wooden bridge.  We already discussed the crossing with the "pedestrian" bridge.  


Walkway to the bridge carve with sculpting hot iron. 


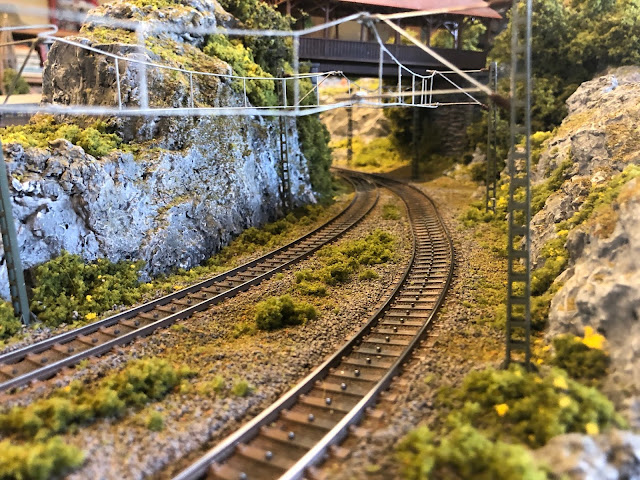
In the last post we discussed the section to the left of the tracks. ....it is still "curing" ( drying --may require about 7-8 days to cure )  Now we are focused on the section to the right of the tracks....already scenic'd with rock moulds and Sculptamold ( SC).   Track is weathered and the curves are "super-elevated" with 3mm foam strips ...trains look cool traveling around the curves ! 


You can see the wires on the distant side of the Pedestrian bridge...which when connected will illuminate the bridge interior. 


More cantenary to be added....


Preparing the outside section...how gluing foam scraps to build an outline. 

Again note the canting of the  track with the 3mm foam board. 


This terrain "notch" was intentional in its location.....placement of trees, terrain features,  and contour of mountains should all have a purpose, and that is to take the viewer's eye to a specific location on the layout.  That intended "target" for the viewers can be a section of the mural, the church, the helix, or just to pull the eye thru the "gap" in the mountains following the trains.  

I was taught by some very accomplished modelers who emphasized that it is better for the train to "dance" in and out of terrain features rather than to disappear into a tunnel.  


Sorry...lighting not perfect...but note the multiple rock moulds.  The black washes certainly make the details jump out.   That's all for now...on to the next post.....thank you for participating.....


Landscaping in Stages. Path from the City, over the tracks, and Return to the Kirche Platz.

Hello all.....

I just completed three stages of Landscaping and thought I would share a few photos and discuss some of the techniques.  I have actually used 4 slightly different techniques to scenic the rock work on the layout, all seemingly blending into each other.....fun to experiment !

Let's look at the first project: 

In our first stage we needed to create an initial path from the city up to the path already created to the chapel shown on previous slides.

Below:  The foreground area at 6:00 is the area of interest for this initial discussion.  We can see the "pedestrian" bridge crossing multiple tracks ( kit bashed from two kits ) to the other terrain feature at 1:00 and one of the stair sections which came with the kit at 4:00 providing entry from the city to this upper level.

We'll examine the area across the tracks at 1-2:00 with the next session.  The area of "pink" foam board is the tunnel formation, and the large mass of layered blue foam at 10:00 will be in our third session.

I hope you are laughing with me with the use of scrap foam below to build the base for this formation.  I carved some of the foam with a small rod foam cutter : 
( https://www.amazon.com/gp/product/B07BHDLC76/ref=ppx_yo_dt_b_asin_title_o04_s00?ie=UTF8&psc=1)  

Actually a pretty nifty little foam cutter.   Foam formation below looks really rough, no?  '-)

Also below, we can see the Kirche Platz and the path to the Chapel mentioned earlier. 


Carved out the ramp across the tracks to the upper bridge with the  foam cutter...saved a lot of rasping, carving and vacuuming......


Covered the foam base with orthopedic gauze ( commercial available in bulk ) and Sculptomold ...love to work with that material.   Used multiple rock mold castings as well.  We can see the re-located stairs a 9:00 near one of the city bulidings.  Now for the staining and landscaping. 


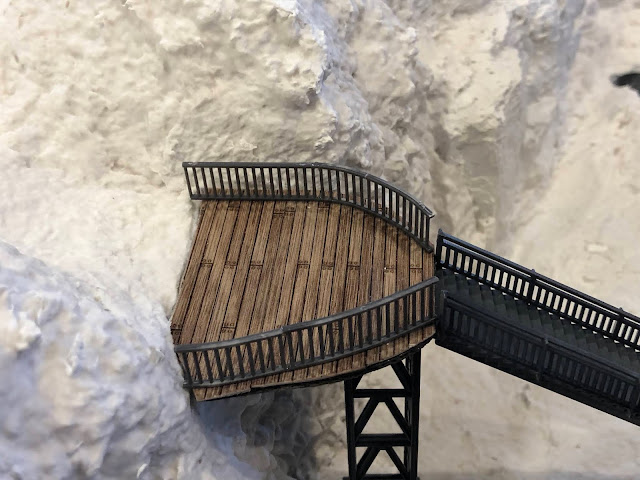
To connect the stairs to the pathway, I had to scratch build a walkway.  Used a thickish piece of cardboard,  painted it, and covered it with Noch wood planking.  Added railings...

We now can note how the stairs connect with the path which veers to the left to reach the Chapel, and to the right to reach the pedestrian bridge.   Note the rock molds...multiples !  

There are multiple videos demonstrating how to incorporate the rock molds in the scene with the Scupltamold....just us a 1-1 1/4" old brush and "work in" the SC into the joints around the rock molds. ...blends well. 

Staining technique: 
1) Air brush the unfinished plaster / Sculptomold base with a light gray paint....
2) Dilute yellow ochre, burnt umber and raw sienna as accent stains. 
3) Multiple very dilute black washes over the entire surface...makes the creases "pop" out ! 
4) Dry brush with white acrylic in a tube. 
5) With a small artist's ( 1/4" )brush, paint on dilute Mod Podge ( about 4:1 ) over the areas where you want to add some very fine greenery --like a lichen or moss growing among the rocks. ...I use a combination of Woodland Scenics fine turfs..( Burnt Grass and Earth Blend mixed in a plastic cup and gently blown onto the wet surface with a small spoon of material and propelled by a puff of breath. )  
6) Then I sprinkle on a mixture of WS coarse turfs if a light green and yellowish color.  Throw in a little red and yellow coarse turfs --and you have field flowers ! 
7) I also like to use the WS "Foliage"...a netting material impregnated with a fine green material....nice to cover over junctions of tunnel entrances and where the Sculptomold meets the tunnel mantels. 
8) The "tree" material I used is WS "Fine Leaf Foliage".....beautiful material but also very expensive ....I'll bet there are better options out there , but I started using this after watching some videos and decided not to change....conformity within the entire layout. 
9) Fix the loose materials in place:  first spray with a  FINE mist of rubbing alcohol, then with a FINE mist of dilute Mod Podge. 


Hikers have now gained access to the fist level on the path to the Kirche Platz...they'll have to cross the pedestrian bridge and then the small wooden bridge seen at 2:00 ...both illuminated, BTW.   ( the path base is a fine ballast material) 


Saturday 20 April 2019

Block Signal Network Problem ---BEWARE !

Hello friends...

I have been slowly installing a block signal network and recently encountered a significant problem:  With the most recently installed set of signals, one block signal would not communicate with the next block signal in line !
How rude! ;-)


 Below is Signal # 14 on my layout.  ( 76495 )  Programming achieved with the method described in my previous post using the programming track connections and CS 3.   ( this particular signal placed more toward the middle of the lanes b/c the longest passenger cars would scrape the signal if attached per usual  )

The address for this signal has been created.   The next signal is # 17 ( 76495), also a block signal.

Signal # 17 is red.  The signal below is # 14 and should show twin yellow Distant lights indicating that the next signal ( # 17 ) is red.  Obviously signal # 14 does not show the yellow lights !

So what is wrong?

( Remember: if the signal is red, it will NOT show any distant indicator lights for the next block signal--ONLY if the block signal is green will the distant indicator lights illuminate )


So let's examine the "configuration" data for Signal # 14.....  

Edit --> Edit Article --> Find the signal in question,  --> click on the signal --> click on Configuration bar--> this window appears.  ( allow time for each of the two horizontal bars to load ...a few seconds ) 

Click the SECOND line ( Configuration ) and then you can examine the data. 


The address for the next "distant" signal is correct:  218 ( which is the home signal address for signal # 17..the next in line ) This data was entered when the signals were mounted on the layout. 


NOTE WELL: Under CV "Type Distant Signal Mast" ...there is NO SIGNAL !!!!  This is why Signal # 14 will not read the next signal in line !

Now how to correct this problem?


Click on the "Type Distant Signal Mast" ON THE RIGHT HAND SIDE COLUMN ....and in this adjacent column,  the rectangle becomes white with the following choices: 

1) No signal
2) :::  ( I have no idea what this means)
3) Block
4) Entry
5) Exit

Click on the "Block " choice....indicating that the next signal is indeed a block signal

Below ...note that "block signal" is now in the CV for "type distant signal mast".


And now we have success !  Signal # 14 reads the home signal status of # 17..the next signal in the block chain!


This is signal # 17 ....red.  


The underlying quandary is why did this situation occur now?  I installed a pair of block signals a few months ago in the same manner, and quite frankly, I do not remember changing the "type distant signal mast"  CV as we discussed....so I assume it occurred spontaneously. ....I have no answer for what happened here.

 This post is only to advise others how to remedy a similar problem if encountered.

Rick Sinclair of the Marklin Dudes was the sagacious advisor who sleuthed the solution in just a few minutes.  Thank you, Rick!!!


Tuesday 9 April 2019

How to Program MFX signals with the CS 3

Hello everyone....hope all is well with you.

This blog entry focuses on how to program mfx Marklin signals ( 76xxx ) onto the CS3!

After returning from a two month hiatus visiting grandchildren, I stumbled once again as I attempted to program new signals for the layout.  I had documented the basic steps, but forgot an important sequence in the programming and thus I had to experience a "refreshment" of the "learning curve".

I hope that this step by step blog entry will save some of  you some indigestion, without insulting anyone's intelligence!  Let's begin:

Basic "first class" Marklin packaging.

Remove contents!  Programming the 76xxx series differs significantly from the previous Marklin series of signals.


The enclosed brochure lists all the possible codes.  I will program this signal to # 220 on the CS3....in other words, there are 219 available slots ahead of this position.


The circuit board.  Toggle # 1 is in the on position per Marklin.


Circuit Board now programmed to the digital code.  Note that the #10 is in the "on" position!  I am programing all my signals with the DCC format as recommended by the "Marklin Dudes", and also exemplified in the "manual" Item # 03092.  Page 49-52.   The # 10 must be on for programming in DCC.


The circuit board is now connected to the signal and to the R/B wires for power.  See the brochure for the proper connection sites.  ( Stop track red wires intentionally not connected yet)

My programming track is located in the staging yard.  I ran auxiliary R/B wires to an extra piece of inactive track, to which I can then connect the Signal's R/B power spades to the track.   Now we're ready to begin programming to the CS3.


Click on the "Edit" tab, select "Discover mfx items".


Click "ok" for the CS3 to search for the NEW mfx item...namely our mfx signal connected to the programing track.


This "magic" box appears ....the CS3 is searching for our new signal circuit board.


Now this is where it can be confusing....the new item ....our signal icon, appears at the beginning of the "article list" cue......NOT next to all the other signals previously programmed into the CS....why?---because we have not yet assigned an ordinal number for the cue list.

Note the little red "m" next to the new icon...this means that this article is an mfx item.


Click on the "Edit" tab once again and select:  "Edit Article List" .   Remember that at the end of this process, if you wish to check the signal ....or any other article added to the list --from a turnout to a light---you MUST EXIT the "Edit" mode.


Now we see the page for editing the signal icon.  Note that the format is DCC.   I assigned the "cue position AND address of # 220.  Usually the CS3 selects the correct icon for the signal automatically.

Here the signal is named "Exit signal"....I eventually changed the name to Sig # 18.

Remember to begin this "naming" process with the open TDCB  ( Track Diagram Control Board) page to which the signal will be positioned on the track board. 

Here the signal icon appears on the proper page.   ( I often forget to do this little step ...ugh! )

I did not document moving the icon on the TDCB to the proper position.  One has to check the "Edit" tab, then check the "EDIT TDCB" and then drag the icon.....now located deep into the Right Lower Corner of the TDCB page into the intended location on the TDCB page...ie ....next to its track location !


Now our signal icon is in the proper position in the Article List cue.  Hard to read, but it is the third icon from the right on the bottom row.  .....signal # 18 !

NOTE again, that the green check mark is next to the "Edit" tab.....if you wish to check this signal, you must exit the Edit tab.


Now we can feel at least a little smug that we successfully programed a signal into the CS3 and IT WORKS !


Great...the "red" works too!  ;-)    Now let's install the rascal!


Install items:
1) Manual ! doh!
2) Wire cutters...will have to shorten the wires...plan on a mount under the C track.
3) Marklin wire stripper....I guess these are not available now...mine is about 19 years old1
4) Portable butane soldering iron, and solder.
5) Electrician's tape--to anchor the wires under the C track.
6) Portable "flame thrower" to shrink the shrink wrap around the soldered wire unions...after shortening the wires.
7) Surgical "pick up" ( tweezers ) and iris scissors.
8) Black marker to record on the layout where the "insulation" points are located. ( stop track)


"Power wires for the signal....remember to make certain to provide power to the track on BOTH sides of the stop track .....I have been embarrassed numerous times by failing to do so...I've had to run additional feeder wires to solve the problem.


Insulation point for stop track. Red wire in lower right attached to source of power to the circuit board,  and the other red wire ( not seen ) feeds the stop track.  Don't forget to check the power to the "stop track" with the signal on red" !!!!!  ....if the check fails....suspect your insulation points !


The "other" red wire for the stop track.  Blue/ White wires heading for the signal on the Lt.


Signal attachment mechanism seen on Lt. ....note that the assembly occurred on the EDGE of the layout so the signal could be installed to the track, the wires affixed to the track with the electrician's tape--as neatly as possible....

Note also the shrink wrap around the connection from the signal to the circuit board.


Don't forget to check to make certain that your longest wagon can negotiate the curve and not hit the signal .....goes for Cantenary as well!


When working around signals...try this trick....provides some modicum of protection so you won't destroy a very expensive piece of equipment !


Installed the 76495 in under 15 minutes!   Both signals work beautifully.....


Hope this little treatise helps someone....

Thank you for reading ....blessings....alan